Edible Glitter and Metallic Paints: A Decorator’s Guide to Sparkle, Dimension, and Safe Edible Accents
Estimated reading time: 9 minutes
Key Takeaways
- Sparkle with confidence using edible glitter and metallic paints that are safe for consumption and versatile on fondant, chocolate, royal icing, cupcakes, cakes, and cookies. Plan for mood and effect.
- They add dimension and depth, from halo edges to subtle washes on large areas.
- Choose between dry dusts for soft highlights and paint-based finishes for crisp lines and solid color blocks.
- Test on scraps first to prevent surprises on your final piece.
- When using printed sheets, apply shimmer strategically to borders and key details to frame the artwork.
Table of contents
- Introduction
- What Are Edible Glitter and Metallic Paints?
- Combining Shimmer with Printed Sheets
- Compatibility with Prints
- Workflow tips
- Applying Luster Dust on Edible Prints
- Safety and Safety of Edible Metallic Accents
- Practical Tips, Best Practices, and Product Recommendations
- Troubleshooting and Common Mistakes
- Step-by-Step Mini-Guides
- Image ideas and accessibility
- FAQ
- Conclusion and Next Steps
Introduction
If you want sparkle that pops on any treat, edible glitter and metallic paints are your best friends. Edible glitter and metallic paints bring light to fondant, chocolate, royal icing, cupcakes, cakes, and cookies. They add shine, depth, and a touch of magic without sacrificing safety. This guide shows you practical, step-by-step techniques to use shimmer in many ways—on plain surfaces and on printed sheets alike. You’ll learn how to apply sparkle with confidence, how to mix the right paints, and how to keep things safe for everyone who will eat your creations. We’ll cover techniques, safety considerations, and simple workflows you can start today. You’ll also find quick-start product ideas and tips for keeping colors vibrant and textures smooth. By the end, you’ll feel ready to experiment with printed sheets, luster dust, and edible sprays to add just the right amount of glow to every piece.
What Are Edible Glitter and Metallic Paints?
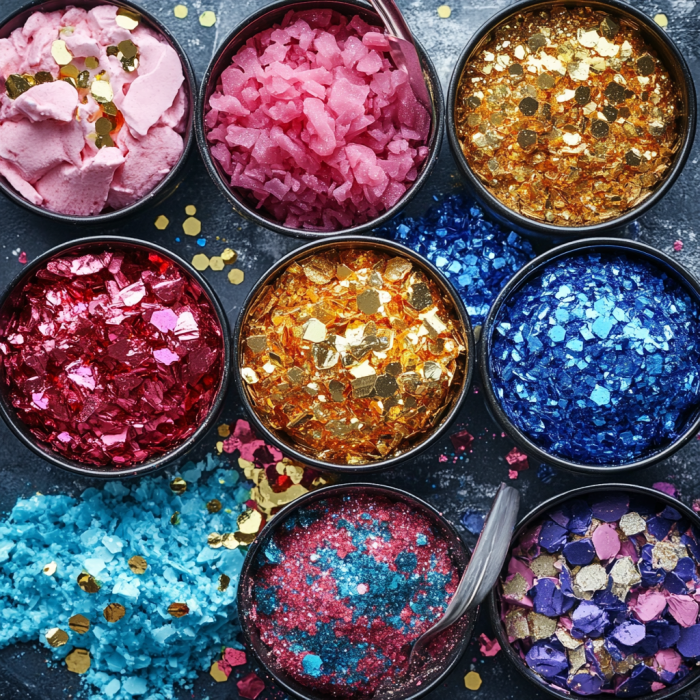
Edible glitter and metallic paints are designed for food use, giving you sparkly, eye-catching decoration without scary guesswork. Edible glitter is a sparkly garnish made from food-grade particles that sparkle when light catches them. Metallic paints are finishes created by mixing luster dust with liquids such as alcohol-based solutions or extracts to form a paintable coating. These products are formulated to be safe for consumption and are often FDA-approved or food-grade. They differ from craft glitters or non-edible paints, which may contain plastics, dyes, or metals not approved for eating.
You can use them on a variety of surfaces and media:
- – Fondant: for bold, even shine or concentrated accents.
- – Chocolate: for fine lines, borders, or a glossy metallic wash.
- – Royal icing: to highlight details and create a reflective finish.
- – Cupcakes, Cakes, Cookies: to add sparkle on entire surfaces or as tiny confetti-like accents.
The sparkle they create comes from how light reflects off the metallic sheen or from the confetti-like texture of glitter. Edible glitter and metallic paints help add dimension by giving flat surfaces a vivid, luminous look. They are versatile enough for both large areas and delicate details, making them a staple for decorators who want noticeable glow without overpowering the design.
A quick note on technique and safety: choose dry application (glitter or luster dust) for soft, dusty highlights, or paint-based finishes when you want crisp lines and solid color blocks. When selecting colors, think about the design’s mood—warm golds for luxury, cool silvers for modern edges, or iridescent mixes for whimsical effects. Tools you’ll likely use include soft brushes for dusting and a fine-tipped brush for paint, with alcohol-based liquids used to thin metallic paints when you want a watercolor-like wash. The goal is sparkle that elevates the design while staying deliciously safe to enjoy.
Combining Shimmer with Printed Sheets
Printed sheets—wafer paper, sugar sheets, or icing sheets—offer a quick path to intricate designs. They’re edible images that can transform a simple cake or cookie into a storytelling piece. To shimmer these prints without dulling or bleeding the image, you’ll want a careful approach. Here’s how to do it well:
Techniques
- – Apply sparingly after the sheet has dried completely. This minimizes the risk of smearing or bleeding the ink.
- – Use dry luster dust on the edges or around the border for a glow that frames the image, rather than covering the central artwork.
- – For watercolor-like effects, use alcohol-based paints or sprays. Dilute the paint with a high-proof alcohol (such as vodka or a dedicated cake-decorating spirit) and apply in light layers. Alcohol evaporates quickly, which reduces smear risk.
Compatibility
- – Alcohol-based paints or sprays are generally safer with edible prints than water-based paints, which can moisten the paper and blur the image.
- – Layer prints first, then shimmer on borders or selected areas to create contrast and depth.
- – Always test on scrap sheets before applying to your final piece. This allows you to see how the shimmer behaves with your particular print and paper type.
Workflow tips
- – Plan your shimmer placement by design: light around the edge for a halo, or selective sparkle on key details.
- – Start with a light touch; you can always add more later.
- – Allow each layer to dry fully before adding the next to prevent smudges.
Practical prompts
- – Step-by-step workflow suggestions: print first, then dust the edges or apply a light watercolor wash near the periphery to frame the image.
- – Quick safety checks: confirm the printed sheet shows no softening when touched, and ensure the shimmer sits on the surface rather than soaking into the print.
Applying Luster Dust on Edible Prints
Enhancing edible prints with luster dust adds a glow that harmonizes with the printed artwork. The right sheen can lift a simple image into a gallery-worthy piece.
Safety and Safety of Edible Metallic Accents
Safety comes first with any edible decoration. When choosing powders and paints, look for clear labeling and certifications.
- Certification and labeling: Choose products labeled “100% edible” and with clear FDA or equivalent certifications. Avoid anything without explicit food-grade labeling.
- Ingredient notes: true metallics often use mica-based pigments. Non-edible versions may contain plastics or non-food metals. Always verify.
- Handling and storage: store in airtight containers away from moisture. A dry, cool place helps maintain color and texture. Typical shelf-life is 1–2 years if sealed and kept clean. Use clean, dry tools to prevent contamination.
- Misconceptions and red flags: not all “luster dust” is edible; always check for “edible” on labels. The alcohol in paints evaporates, leaving no taste or residue. Be wary of unlabeled imports or craft-store items when decorating for cakes and cookies.
- Child safety: if certified edible, it’s generally safe for family consumption; still, avoid introducing non-edible elements on pieces meant for kids.
These safety notes help you plan a design you can trust. When you clearly label products and store them properly, you protect your customers and your reputation.
Practical Tips, Best Practices, and Product Recommendations
A fast-start toolkit helps you get sparkle quickly. Here’s a practical quick-start guide to product types and when to use them, along with some brand cues and best practices.
Quick-start checklist
- – Edible glitter: Use for confetti or toppings. Texture matters—adhesion with icing glue can help keep sparkles in place.
- – Edible metallic paints: Use to paint fine details or create a metallic wash. You can buy premixed options or DIY by mixing luster dust with an alcohol base. Check colorfastness and how well they sit on fondant or royal icing.
- – Luster dust: Best for dry brushing or soft, shimmering highlights. Look for 100% edible brands that are known for smooth, fine powder and consistent color.
- – Edible sprays: Great for even coverage on large areas or for a quick, uniform sparkle. They’re typically easier for beginners and can help reduce brush marks.
Tools to watch for: soft brushes, clean small brushes for fine lines, a spray bottle for even application if using sprays, and a small air-tank or pump for even coverage if you use sprays.
Product attributes to seek
- – Edibility and clear labeling
- – Color fastness and fade resistance
- – Compatibility with fondant, royal icing, chocolate, and printed sheets
- – Alcohol-based applicability to avoid bleeding on prints
Brand notes and practical tips
- – For luster dust, reputable brands with consistent pigment sizes and fine textures help reduce graininess.
- – Premixed edible metallic paints provide consistent results and reduce the guesswork for beginners.
- – When painting large areas, a spray can or airbrush-style upgrade can deliver a smooth finish and fewer brush marks.
Troubleshooting and Common Mistakes
- Bleeding – Cause: Wet ink or moisture seeping into the edible sheet or print. Fix: Wipe with a dry cloth or alcohol wipe, then allow a full dry before proceeding. Reapply with a lighter touch or after a fresh dry period.
- Flaking or Smudging – Cause: Too much powder or thick paint that dries unevenly. Fix: Use a fixative spray or sealant in a light, even coat. Brush off excess gently and reapply in smaller layers.
- Dulling prints – Cause: Over-saturation of color or a heavy glaze layer. Fix: Apply only light layers and avoid overworking the print. Always test on scrap first.
Step-by-Step Mini-Guides
Mini-guide A: Applying edible glitter and metallic paints to a finished cake
- – Step 1: Mix a small amount of metallic paint in a clean dish with a tiny amount of alcohol to create a paintable wash.
- – Step 2: Paint delicate details or edges with the wash for a metallic base.
- – Step 3: While the paint is still tacky, sprinkle fine edible glitter lightly, letting the sparkle catch the light.
- – Step 4: Allow to dry completely before serving or shipping.
Mini-guide B: Sparkling a printed sheet without compromising its image
- – Attach the printed sheet securely to the cake or cookie.
- – Lightly dust the edges or border areas with luster dust to create a glow border.
- – Seal with a thin layer of edible glaze to protect the print and set the shimmer.
Mini-guide C: Layering luster dust over edible prints with a sealant
- – Dust the print lightly with a soft brush to add a soft glow.
- – Paint a very thin layer of edible paint over the dust for extra depth.
- – Seal with a light glaze and allow to dry.
Keywords: applying luster dust on edible prints, combined with subtle paint layers for depth
Image ideas and accessibility
- – Close-ups of sparkle on fondant and chocolate surfaces.
- – Shimmer on edible prints with a visible border glow.
- – Luster dust on printed sheets with a sealed finish.
- – A finished cake showing clean sparkle and a balanced shine.
Alt text suggestions: “Close-up of fondant with gold edible glitter,” “Edible prints with subtle luster dust glow around the edges,” “Sprayed shimmer on large cake surface.”
For additional design ideas and inspiration, you can also explore Edible Photo Cake Ideas: Creative Designs for Personalized Celebrations.
Conclusion and Next Steps for Edible Glitter and Metallic Paints
Edible glitter and metallic paints open up a world of sparkle for decorators and cake artists. The key is safety and planning: choose edible, certified products; test first on scraps; and layer your sparkle to build dimension without dulling or bleeding. Combining shimmer with printed sheets becomes a powerful tool when done thoughtfully—use borders and light washes to frame the image while protecting the print. Applying luster dust on edible prints gives a soft glow that elevates the artwork without overpowering it.
Next steps are simple:
- – Start small: pick one surface (fondant or printed sheet) and practice light dusting followed by a gentle seal.
- – Build a mini toolkit: soft brushes, a few colors of luster dust, a bottle of high-proof alcohol, a reliable edible glaze, and a couple of premixed edible metallic paints.
- – Experiment with textures: a dry dust on one piece, a painted wash on another, and a glazed finish on a third to compare results.
- – Share your results: your fellow decorators will enjoy seeing how your sparkle evolves from page to cake.
This approach keeps you safe, productive, and creatively free. Edible glitter and metallic paints aren’t just about pretty shine; they’re about adding confidence, dimension, and a touch of magic to every dessert you decorate. Enjoy the shimmer, and let your designs glow.